Sunday, December 28, 2008

Recipe Catch Up - 11/9 - Florentine Meatballs

I got this recipe from another blog I read. The author got this recipe from Rachael Ray, who is also one of my favorites.

Florentine Meatballs
recipe from Rachael Ray
Ingredients
1 box frozen spinach, defrosted in the microwave
1 1/3 lb ground turkey breast
1/2 of a medium onion, finely chopped
3 cloves garlic, chopped
1 large egg
1/4 c. milk
1/2 c. grated Parmesan cheese
3/4 c. bread crumbs
Olive oil

Directions
Preheat oven to 400 degrees.

Wring out defrosted spinach. Place turkey in a bowl and make a well in the middle of it. Add the spinach, onion, garlic, egg, milk, bread crumbs, Parmesan and salt & pepper to taste. Mix well and form into 12 large balls. Place on a non-stick cookie sheet and drizzle with olive oil. Cook for 20 minutes in the oven until cooked through.

The Photos
I served them at meatball subs. Here's the sub with just the meatballs & a little tomato sauce:

And, here's the sub after I added some mozzarella cheese & more tomato sauce:


The Verdict
The recipe calls for 1 1/3 pounds of turkey because that's what normally comes in a package of ground turkey, so don't worry about the weird measurement. For us, this made way more than 12 meatballs - more like 20. But, they froze really well. We really enjoyed the subs, and we ate the leftovers from this batch with spaghetti and sauce and they were equally as good. It's a simple recipe and I love that it makes enough for 2 meals! I've since made them again and we have half a batch in the freezer right now.

Monday, December 8, 2008

Penne with Sweet Red Pepper, Ginger & Feta

I've done it again - I'm behind on my recipes! Although, I don't think I've done one every week here lately, so I might not be as behind as I think. This was my last recipe for October. There's actually one before this, but I skipped it by accident. I'll get it up in a day or so.

I found a new cooking blog to follow, Prudence Pennywise. She has good recipes, and she focuses on things that are (relatively) inexpensive. Just a little warning - she has music playing (one of my pet peeves) - and you have to scroll all the way to the bottom to turn it off. So, if you're at work, and you don't want anyone to know you're not working, mute your speakers before you click the link! Then, do what I do and read the blog in a reader, so you don't have to deal with the music on a regular basis.

Whole Grain Penne with Sweet Red Pepper, Ginger and Feta
from Prudence Pennywise

Ingredients
8 oz. box Penne Pasta
4 green onions (greens only)
1 (14.5) ounce can Italian Style diced tomatoes (blended smooth in blender)
1 large red bell pepper
1 small handful fresh parsley (save some for garnish)
4 Tbsp cream or half and half
2-4 Tbsp Feta - crumbled
2 Tbsp finely chopped ginger
2 cloves garlic, chopped
salt & pepper to taste


Directions
Heat the olive oil in a small, heavy-bottomed saucepan. Remove the top, seeds and membranes of the pepper and slice into thin strips. Toss them into the saucepan & let them soften on low-medium heat for 10-15 minutes, stirring occasionally.

Meanwhile, peel and chop the ginger & garlic. Start cooking the pasta.

Add the ginger & garlic to the saucepan and saute for 2-3 minutes. Add the crushed tomatoes. Season with salt & pepper.

Chop 2 of the onions & add them to the sauce. Simmer on low heat, partially covered, for 5 minutes. Add 2-3 Tbsp of water if necessary to keep a sauce-like consistency.

Chop the parsley & add to the sauce. Let the sauce cook, partially covered for another 2-3 minutes, then remove from heat & set aside.

Plate the pasta, top with sauce and 1 Tbsp of cream per plate. Crumble 1/2 Tbsp of Feta on each plate. Garnish with parsley & serve.

The Photo


The Verdict
As you can see from the photo, I added far more than 1/2 Tbsp of cheese. What can I say? We love cheese. I also do not remember blending the tomatoes in the blender. From the photo, it doesn't look like I did. I don't think it mattered much. We honestly did not get much of a ginger flavor, but the ginger I used had been in the freezer for a while.

Since my husband isn't a huge fan of completely vegetarian meals, I cut a couple of chicken breasts into bite-sized pieces and sauteed them, then added them to the sauce.

Overall, though, we liked it and I want to make it again. I bought some ginger for this week's recipe, so maybe if I don't use it all, I will try this one again next week.

Saturday, October 4, 2008

Recipe of the Week - Yogurt Parmesan Chicken

Yep, this is the recipe of the week for last week!! I am finally caught up. Well, kind of. The week of 9/20, I made a really good Mexican dish, which I kind of made up myself. I clearly remember writing down how I did it after the fact, but I can't find the document. So, I will have to make it again sometime and post it then.

Anyway, I made last week's recipe on Monday.

Yogurt Parmesan Chicken
from Stirring Performances by The Junior League of Winston-Salem

Ingredients
1/2 c. plain yogurt
1/4 c. mayonnaise
1/4 c. green onion, chopped
1/2 t. Worcestershire sauce
8 chicken breasts
Salt & pepper to taste
1/2 t. thyme
1/2 c. lemon juice
1/2 c. Parmesan cheese

Directions
Preheat oven to 375.

For the sauce, blend well the yogurt, mayonnaise, onions and Worcestershire sauce.

Place the chicken in a 9 x 13-inch baking dish. Sprinkle with salt, pepper and thyme. Pour lemon juice over it.

Pour yogurt sauce over chicken. Then sprinkle with Parmesan cheese.

Bake for 1 hour.

The Verdict
There is a photo of this, but my husband left the card reader at work, so I can't get it off the camera.

This dish was so yummy and really quite easy! I used Greek yogurt, because it was the only kind of plain yogurt that came in a single-serving container. I didn't want to buy a big thing of it knowing I wouldn't use it all in a timely manner. The single serving was 6 oz., and I used all of it. The recipe doesn't specify dried or fresh thyme; I used dried. I didn't really measure, I just sprinkled it over the chicken. Same with the lemon juice - I just used 2 small lemons and squeezed them right over the chicken. Then, I just used my microplane grater to grate some Parmesan over it. Although I only made 3 chicken breasts, I still made the full recipe of sauce. If I was going to do 8 breasts, I might double, or even triple the sauce recipe. It's so good, you'll want extra!

I served it over cous cous, with a side of broccoli.

Friday, October 3, 2008

Birthday Party and Recipe of the Week for 9/13

For my husband's birthday, I made a dish I've been wanting to try for quite some time. But, I knew it wasn't the sort of thing you'd make for just two people, so I had to wait for an occasion where we'd have guests. I invited a few friends for a small dinner party and eagerly pulled out this recipe!

It's a baked pasta dish, but with a twist - you bake it in a puff pastry shell, using a springform pan.

In the interest of time, so I can get caught up, I'm just posting the link:

Baked Angel Hair with Eggplant
from Giada DeLaurentiis, The Food Network

The Photo


Here's a photo of the dish, before I cut & served it. The glass bottom of my springform pan fit perfectly onto my pewter tray. I initially had a cake knife out out to cut it, but we ended up having to use a chef's knife. The cake server worked well, though! I wish I'd taken a picture of a slice; it looked really cool!

The Verdict
I made one change, which was to leave out the eggplant. Neither of us is really a fan. I considered artichoke hearts as a substitute, but ultimately decided the turkey sausage would be enough. (If you have an idea for a substitute, leave me a comment and maybe I'll try it next time!)

One mistake I made was that I didn't read the recipe thoroughly enough and I missed the part where you are supposed to let the pasta mixture cool before you put it in the pastry shell to bake. We ended up having to shove it in the fridge (which I know is a bad idea, as it brings down the temp in there but I didn't have time to wait).

I suggest putting a sheet pan on the rack below the springform pan. I guess some grease from the sausage dripped into the bottom of my oven. I didn't notice, until the next time I went to use the oven and smelled an awful burning smell. That resulted in two rounds with oven cleaner and a couple of nights of baking dinner in the toaster oven. Basically, it was a huge mess, which could be avoided by having something to catch the drips!

We ended up letting it sit for longer than 20 minutes and I was concerned it would be cold, but it was still hot & steamy.

Everyone at the party raved about the dish! There were 2 portions left over and I had them for lunch over the next couple of days, heating them up in the toaster oven (I don't think using the microwave would be successful.

More Photos
Here are a few more photos of the event.

The table, set for dinner

A close-up of the place setting. I used my New Yorker cartoon plates as the salad plates.
The bar area. I lined up 3 TV trays and draped them with a full-size table cloth.

Thursday, October 2, 2008

Recipe Catch-up - Week of 9/6 - Cola Cake

This recipe was inspired by a trip to Cracker Barrel. We went for breakfast one day, and my husband noticed a card on the table advertising their Coca-Cola Cake. Since we were there for breakfast, he didn't get it, but I mentioned I thought I'd made one before. I remember my friend J. had a Coca-Cola cookbook, and we tried a few recipes from it the summer I lived with her & her family. Anyway, all this led to the suggestion that I should make the cake for his birthday, which was coming up. (He is a huge fan of Diet Coke and Coke Zero!)

So, I set out on a quest to find a recipe. Ultimately, I found it in the place I should have looked to start with - the Coca Cola website! They actually have a great section of recipes using their products.

I decided I was not about to make a brand-new kind of cake for a party without testing it out first. Since we were going to out of town to see some friends, I decided to make one and take it with us.

Cola Cake
from Coca-Cola Recipes

Ingredients
For cake:
2 c. sugar
2 c. all-purpose flour
1 1/2 c. small marshmallows
1/2 c. butter or margarine
1/2 c. vegetable oil
3 T cocoa
1 c. Coca-Cola
1 t. baking soda
1/2 c. buttermilk
2 eggs
1 t. vanilla extract

For Frosting:
1/2 c. butter
3 T. cocoa
6 T Coca-Cola
1 box (16 ounces) confectioners' sugar (note: this is 4 cups)
1 t. vanilla extract
1 c. chopped pecans

Directions
Preheat oven to 350 degrees.

In a bowl, sift sugar and flour. Add marshmallows.

In saucepan, mix butter, oil, cocoa and Coca-Cola. Bring to a boil and pour over dry ingredients; blend well.

Dissolve baking soda in buttermilk just before adding to batter along with eggs and vanilla extract, mixing well.

Pour into a well-greased 9 x 13-inch pan and bake 35-45 minutes. Remove from oven and frost immediately.

To make frosting, combine butter, cocoa and Coca-Cola in a saucepan. Bring to a boil and pour over confectioners' sugar, blending well. Add vanilla extract and pecans. Spread over hot cake. When cool, cut into squares and serve.

The Verdict
One thing I read on the AllRecipes website while I was looking for the recipe was that this cake is very sticky, and it does best baked in the 9 x 13 pan and served from there. I really wanted it to look like a real birthday cake, though, and use my new cake-decorating skills to decorate it. So, I came up with the idea of using a springform pan. For good measure, I lined the pan with parchment paper, which I "glued" to the sides of the pan with cooking spray. I wanted to spray it with Baker's Joy, but my canister was all clogged up so I skipped that on the test cake & hoped for the best, but it worked fine. The cake was a little lopsided on top, but it still looked okay.

I only used 3/4 c. of pecans, because that's how the brand I like to buy is sold, and I had a coupon for buy one, get one free of that size. But, it was more than plenty!

I didn't take any pictures of this version, but I will have some to share in the post about my husband's party!

Monday, September 29, 2008

Recipe Catch Up - Week of 8/16

Okay, September's over tomorrow, and I'm still on August's recipes. I am determined to catch up this week! Plus, I am planning on making this week's recipe tonight, so I'll have another one to add!

I got this recipe from the "Grubfest" episode of Paula Deen's show. I love that episode, only in part due to the fact that her sons, Jamie and Bobby are on it. Boy, are they cute! I've had this recipe in my Food Network "recipe box" for quite some time and was reminded of it when the episode ran again. The original recipe calls for beef, but since I don't eat it, I substituted turkey.

from Paula Deen, the Food Network


The Photo
Here it is - doesn't it look yummy?


The Verdict
This was really good. My DH liked it a lot! As I said, I substituted turkey for the beef. I also cut the recipe in half, and it was still enough to fill my 9 x 11 casserole, so it was more than plenty of food for the two of us! I ate on it several days for lunch.

Wednesday, September 17, 2008

Recipe Catch-Up, Week of 8/9 - Chicken Parmesan

I am very excited to share the awesome dinner party I threw last weekend for Alec's birthday. But, before I do, I am making myself finish catching up on the Recipe of the Week backlog. Also, I have not downloaded the pictures from the dinner and I don't know where Alec put the card reader.

Anyway . . .

The week of 8/9, I tried my hand a Chicken Parmesan. I got the recipe from a cookbook I've had for 2.5 years, but haven't used yet, Stirring Performances from the Junior League of Winston-Salem.

Chicken Parmesan with Herbed Tomato Sauce
from Stirring Performances by The Junior League of Winston-Salem

Ingredients
3/4 c. dry bread crumbs
1/3 c. fresh Parmesan cheese, grated
4 chicken breast halves
2 eggs, beaten
1/4 c. olive oil
1 clove garlic, crushed
8 oz. tomato sauce
1/4 t. oregano
1/4 t. thyme
1/4 t. basil
4 slices mozzarella cheese

Directions
Preheat oven to 350 degrees.

Combine bread crumbs and Parmesan cheese in a bowl. Wash chicken and dip in egg, then coat in bread crumb mixture.

Heat oil in a skillet and saute garlic over medium heat. Add chicken and brown 5 minutes on each side. Remove chicken and drain on paper towels.

Arrange chicken in 5x8-inch casserole. In a small bowl, stir seasonings into the tomato sauce and pour over chicken. Top with mozzarella slices.

Cover casserole and bake for 20 minutes. Uncover and bake an additional 10 minutes. Serve.

The Verdict
(No pictures. I forgot.)

The only thing I would do differently is maybe reduce the amount of breadcrumbs a bit. I might try Panko breadcrumbs next time. I just thought it needed to be a little less "bready." I also used grated mozzarella b/c I forgot to buy slices and it's quicker to grate from the block of cheese than to cut it into a bunch of slices. Thus, it melted a lot faster and was pretty much incorporated into the sauce by the time it was done.

Overall, though, it was a successful dish. Alec said he could eat it every week. Which I guess is a pretty strong endorsement. I haven't made it since then, but I have it on the list for next week!

Friday, September 5, 2008

We had a pool party to go to, and the main dish was going to be barbecue. I had checked ahead of time and those in charge of ordering the food were pretty sure they had only ordered beef, pork and ham. None of which I will eat. So, I decided to bring a salad. I found this black bean and corn salad on the Food Network site.

Black Bean and Corn Salad
from 30 Minute Meals with Rachael Ray, Food Network.

Once again, I forgot to take a photo.

The Verdict
It was good, but not fabulous. I got compliments on it at the party, but I wasn't super happy with the flavors myself. I forgot that I was out of cumin, so I substituted some Mexican oregano I had left over from another recipe. So, the flavor was slightly different that intended in the original recipe. I personally was not a fan of the red onion. I think if I make it again, I will use a sweet onion. I used a mixed yellow and white corn, I think from Bird's Eye that was really good.

Recipe Catch Up - Week of 8/2 - Spaghetti Carbonara

This was another Robin Miller recipe from Food Network

I didn't really make an changes, so I'll send you to straight to the Food Network website:

Spaghetti Carbonara
from Quick Fix Meals with Robin Miller on the Food Network

The Photo
Here's a photo. Doesn't it look yummy? I served it just with bread from our fabulous grocery store bakery.


The Verdict
This was so good! I loved it, my husband loved it! And, it was super easy. My one change was to use angel hair pasta instead of spaghetti, because we like it better.

The only thing I will say is stay pretty true to the amount of cheese in the sauce. I recently made it again, and there was just a bit of a chunk of Parmesan cheese left, so I used it all, without really measuring. It was clearly way more than 1/4 cup, because the sauce was way too thick. It was almost the consistency of paste! But, I just thinned it out with some more milk and it was all good.

Monday, September 1, 2008

Recipe Catch Up - Week of 7/26: Chili Lime Chicken & Veggie Tacos

That last post was short, plus if I don't get caught up soon, I never will so I figured I'd do another one!

At the end of July, my husband had a new co-worker move to town. We welcomed her and her husband to town with a taco buffet! They moved here from California & have lived in Arizona, so it's not like they don't know what Mexican food is, but I still thought tacos were a good welcome to Texas!

I didn't do it just like the recipe, so below is my adaptation. Click on the link to get the original recipe!

Chili Lime Chicken & Veggie Tacos
Adapted from Good Things Catered by Katie

Ingredients
4 large boneless skinless chicken breasts
2 green peppers
1 red pepper
1 large vidallia onion
1/4 c. fresh lime juice (1 large lime or two small limes)
1 tsp fresh lime zest
3 Tbsp olive oil
2 tsp chili powder (less if you want less spice)
1 tsp garlic salt
1 tsp freshly ground black pepper
1 tsp paprika
family pack of flour taco sized tortillas
other taco fixings as desired

Directions
Get the grill started. Or, have your husband do it.

Pound chicken breasts to an even thickness. Place in a Ziploc bag & set aside.

In a large bowl, combine lime juice, zest, olive oil, chili powder, garlic salt, pepper, and paprika. Whisk to combine thoroughly.

Pour marinade into the bag with the chicken and squish it around to get the chicken coated with marinade. Put in the fridge to marinate for 20-30 minutes.

Meanwhile, julienne the peppers, and slice the onion into 1/2 inch rounds (keeping onion rounds intact). Lay out a long piece of foil. Place the veggies on half of it and sprinkle with line juice, olive oil & spices. Fold the other half of the foil over & roll the edges to make a cooking packet.

Grill the chicken (take it out of the plastic bag, first!). When it's about 1/2 way done, put the veggie packet on the grill.

When the chicken is cooked, take it off the grill and let it stand for 7 minutes.

Meanwhile, make foil packets of about 10 tortillas each & heat them on the grill.

After chicken as rested for about 7 minutes, slice on the diagonal.

Serve with peppers, onion, extra lime wedges, tortillas and other taco fixings. (We had red salsa, green salsa, Mexican-blend shredded cheese, Chipotle Cheddar shredded cheese, diced tomatoes, sour cream & tortilla chips. I also served black beans)


The Photos
Here are a couple of photos of the taco buffet!

Gotta love the sour cream served right out of the container. At this point, I had also forgotten to put out the cheese. So, that got served straight out of the Sargento bags. Martha Stewart would not be proud. You can barely see them there in the back, but at least I had fiesta-themed napkins!

The Verdict
Well, everyone said they were good! You are supposed to only use about 2/3 of the marinade on the chicken, and the rest on the veggies, but I just didn't read my recipe all the way through so I didn't do that. Hence the fact that I just squeezed some lime juice and sprinkled spices over them. I think I'd used all the chili powder in the original marinade, which is why I didn't make more. The original recipe calls for them to be cooked in a grill pan but we don't have one, which is why we did the foil packet. I also think they'd be good done in a grill basked (we don't have one of those, either). Anyway, they will definitely be made again!

Recipe Catch Up - Week of 7/19: Chicken & Pepper Jack Taquitos

This one was part of my Mexican food kick that I went on in July & the beginning of August.

We had the new camera by this point, but I guess I forgot to take a picture. We must have been really hungry!

It was from the Food Network, and I didn't make many changes, so I'll just provide the link. Robin Miller is my new favorite Food Network host. Her recipes, for the most part, are really easy. On each show, she focuses on 3 dishes you can make for quick weeknight meals. Often, this involves cooking up a batch of something early in the week and then using the leftovers in a new way later. I haven't done a full shows worth of recipes yet, but even on their own, the recipes are quick and delicious.

Chicken & Pepper Jack Taquitos
Quick Fix Meals with Robin Miller, Food Network

I do remember that they were very spicy. Next time, I will probably do half Pepper Jack and half plain Jack cheese. We also did flour tortillas because we like them better than corn.

Wednesday, August 20, 2008

Recipe Catch Up - Week of 7/12 - Mystery Chicken and Neiman Marcus Bars

So, it turns out that I actually made two things the week of 7/12. I kinda thought I had, but I could only specifically remember the Neiman Marcus Bars. But, a look in the camera revealed a picture of a chicken sandwich. I could only guess it was Mexican-style, since the photo showed chips & salsa as a side dish. So the question was, where did the recipe come from? I checked my "recipe box" on the Food Network website and my "starred items" on my Google Reader. Nothing looked familiar. I glanced through a couple of cookbooks. Didn't see anything. I checked in all the spots (other than where they belong) where I stash the recipes I print out. I didn't find it. So, I have picture with no recipe. I guess I might never know.

So on to the Neiman Marcus Bars. My first experience with this delicious dessert was several months ago. My husband and I went to a small town nearby for a sausage festival. In addition to the sausage (which I of course didn't eat) there was a bake sale. We had received free tickets for the sausage meal, so we decided to buy something from the bake sale to support the organization. Okay, that's not the only reason. We picked out a yummy looking plate of something called "Neiman Marcus Bars." We had never heard of them, so we decided to give them a try.

They were delicious! I started looking for a recipe, and I found quite a few, but none of them sounded exactly like what we bought. I never made them, and I kind of forgot about them for a while.

Until I was getting ready for my mom to come visit and trying to pick out some recipes to try while she was here. I pulled out a cookbook she gave me a long time ago, but I had never used, called "An Appetite for Art" which was published by the NC Museum of Art. As I was leafing through it, what did I see but a recipe for Neiman Marcus bars! So, I decided to give them a try.

Neiman Marcus Bars
from "An Appetite for Art" complied & edited by Elizabeth K. Norfleet for the NC Museum of Art.

Ingredients
1 box pound cake mix
1/2 c. butter
3 eggs, divided
1 c. chopped pecans
1 lb. confectioner's sugar
1 8-oz block cream cheese

Directions
Preheat oven to 350. Grease a 9-inch x 13-inch pan with butter.
In medium bowl with electric mixer combine cake mix, butter, 1 egg and pecans. Press mixture into pan bottom.
In another bowl, beat with mixer to combine: sugar, cream cheese and 2 remaining eggs. Spread over cake mixture.
Bake for 35-40 minutes or until golden brown.
Cool and cut into bars. Makes 16 bars.

The Verdict
First of all, it made way more than 16 bars! I sent my husband to the office with about 1/2 of them! They tasted yummy, but I vaguely remembered a different texture from the ones we bought. It seems like maybe those had pecans in the cream cheese mixture as well as the base, or maybe just sprinkled on top. I will probably try another version next time!

Tuesday, August 19, 2008

Recipe Catch Up - Week of 6/28 - Roasted Chicken Breasts with Lemon, Rosemary, Garlic & Seasoned Potatoes

I'm way behind on my blogging, so I'm trying to catch up. I have two weeks in June that I can't remember for the life of me what I made. I tried to scan through my camera for pictures to jog my memory, but I couldn't find any for the missing weeks. I thought maybe it was because I forgot to take pictures. But, what I actually forgot was that our camera was broken. So that would explain why there are no pictures. I guess those two weeks are just gone forever.

Anyway, the week of 6/28 I made this:

Roasted Chicken Breasts w/ Lemon, Rosemary, Garlic & Seasoned Potatoes
from Good Things Catered by Katie

Ingredients
4 boneless, skinless chicken breasts, trimmed of excess fat
1 1/2 Tbsp unsalted butter, softened but not melted
Zest of 1/2 large lemon, lemon reserved
2 large cloves of garlic, minced or pressed
2 tsp fresh rosemary leaves
1 tsp olive oil
1 tsp fresh parsley, finely chopped
3 russet potatoes, washed thoroughly and cut into 3/4 inch cubes
Kosher salt ground pepper

Directions
Preheat oven to 425 degrees and line large baking pan with foil for easy cleanup.

Pat chicken breasts dry, season liberally with salt and ground pepper, and place breast-side up at least one to two inches apart in pan.

In small bowl combine butter, lemon zest, garlic, and rosemary and stir with spoon to thoroughly combine. With back of spoon, spread butter mixture on top of chicken breasts evenly.

Slice reserved lemon and place slices in pan around the chicken.

In medium bowl place cubed potato and toss with 1 tsp olive oil, parsley and salt and pepper.

Scatter potatoes around chicken breasts.

Place baking dish in oven and cook about 30-40 minutes or until thickest portion of chicken breast has reached 175 degrees.

Remove from oven, take chicken breasts out of pan onto a warm serving platter and tent with foil.

Take one pinch more of Kosher salt to sprinkle over potatoes, toss and place back in oven for 5-10 minutes.

Remove potatoes and serve with chicken.

The Verdict
Of course, I have no idea if I substituted anything. More than likely, I used either Yukon Gold or red potatoes. I have a vague recollection of picking up the Russets in the grocery store and my husband's requesting something different. How I remember that, I don't know. I remember the most random things.

Anyway, I do remember it was good, and I will probably make it again!

Friday, June 13, 2008

Recipe of the Week - Orange and Chipotle Rubbed Chicken Breasts

This recipe is from an e-mail newsletter I get - "Weeknight Kitchen" by Lynn Rossetto Kasper of "The Splendid Table" show on NPR. I don't get to listen to her show much, but I like to get the newsletter. Although most of the recipes are quick, they frequently have somewhat exotic ingredients, so I'm not inclined to make them. But, this one seemed really simple so I decided to try it out.

Orange and Chipotle Rubbed Chicken Breasts
I got it from "Weeknight Kitchen" by Lynn Rossetto Kasper.
She excerpted it from: Grill Every Day: 125 Fast-Track Recipes for Weeknights at the Grill by Diane Morgan. Used with permission of Chronicle Books LLC. Copyright 2007 by Diane Morgan.

Ingredients
1/4 cup fresh orange juice
3 tablespoons extra-virgin olive oil
2 tablespoons minced canned chipotle chiles in adobo sauce
2 large cloves garlic, minced
1/2 teaspoon kosher or sea salt
1/2 teaspoon freshly ground pepper
4 boneless, skin-on chicken breast halves

Directions
Prepare a medium-hot fire in a charcoal grill or preheat a gas grill on medium-high.

In a bowl or baking dish large enough to hold the chicken, combine the orange juice, olive oil, chiles, garlic, salt and pepper. Stir to mix thoroughly. Add the chicken breasts and turn to coat on both sides. Let the chicken marinate while the grill heats.

To create a cool zone, bank the coals to one side of the grill or turn off one of the burners. Oil the grill grate. Place the chicken breasts, skin side down, directly over the medium-hot fire and sear on one side, about 3 minutes. Turn and sear on the other side for 3 to 4 minutes. Move the chicken to the cooler part of the grill, cover, and grill until the juices run clear when the thickest part of a breast is pierced with a knife, or an instant-read thermometer registers 165 F, 6 to 8 minutes longer.

Divide the chicken breasts among warmed dinner plates. Serve immediately.

The Verdict
Overall, we liked this one. I thought it was a little too pepper-y so I will probably reduce the black pepper next time (but I don't really like pepper so I'm probably not the person to believe on this one). I could not find minced chiles so I got the whole ones and minced them myself. It took about 3 chiles to get 2 Tbsp.

I made it on our indoor grill, which only takes 5 minutes to heat up so I knew that just letting the chicken marinate while the grill heated would not be enough. So, I let it marinate for about 15 minutes, flipping it 1/2 way through. I did pierce the chicken before I put it in the marinade. Still, I did not thing it marinated long enough. Next time, I will try it for an hour or so. The chicken was still very moist and tasty, I just didn't get much of the orange.

I served it with a side of black beans. I tried these canned "Ranch Style" beans that are supposed to be already seasoned but they were pretty plain. I should have bought regular beans and done one of my other black bean recipes.

Our camera is still broken, so no pictures. We did get some of that canned air stuff the other night to try and clean out the crevices around the lens (the problem being that the lens won't open all the way). That is one of the tips I found on-line for fixing the problem. Hopefully that will work (because none of the other tips I've found have).

Wednesday, June 4, 2008

Recipe of the Week - Salmon Cheddar Bake

I found this recipe on the back of the Honey Boy (r) Salmon can when I bought some for the salmon burgers I made a while back. Since they were on sale, and Alec and I thought this recipe sounded good, I picked up a second can. I finally decided to make it this week. It is basically a salmon and Cheddar quiche.

Honey Boy (r) Alaska Salmon Cheddar Bake
from the Honey Boy (r) Salmon can

Ingredients
1 can (14.75 oz.) Honey Boy (r) Pink Salmon
8 to 9 slices bread, crusts trimmed
1 1/2 cups grated Cheddar cheese
6 eggs
3/4 c. milk
1/2 tsp dill weed
1/4 tsp each salt & pepper
1/4 c. sliced green onion
1 Tbsp melted butter

Directions
Drain & flake salmon, set aside.

Cut bread slices diagonally to make triangular pieces. Arrange bread in spiral pattern in a greased 9-inch pie plate to cover bottom. Arrange remaining triangles upright around edges to form a crown. Sprinkle 1/2 c. cheese over bread in bottom of pie plate.

Whisk together eggs, milk, dill, salt and pepper until well combined. Stir in salmon, green onion and remaining cheese. Spoon evenly into pie plate.

Brush edges of bread with melted butter. Bake at 350 degrees for 35-40 minutes, or until center is set. Check after 15-20 minutes. If bread is browning too quickly, cover edges with aluminium foil.

Makes 6 servings.


As usual, I had a few changes. I skipped the "crust" and just poured the filling into a greased pie plate. I didn't sprinkle any cheese in the bottom, I just put the whole 1 1/2 cups in the main mixture. Since I don't like dill, I substituted dried thyme. I unintentionally left out the onion. I didn't even realize it until I was writing this post! I planned to sub regular onion, as I'd used 1/2 an onion earlier in the week for another recipe so I was going to use that up instead of buying the green ones.

Overall, it was good. It maybe had too much egg. If I make it again, I might just use my usual crust-less quiche recipe from Joy of Cooking for the egg and milk measurements.

Sunday, June 1, 2008

Recipe of the Week: Honey Nut Chicken Sticks

This is actually from the week-before-last. I made it early in the week and then with getting ready to go out of town, I never posted it.

It's another recipe from Food Network, so I'm just posting the link:

Honey Nut Chicken Sticks
from 30 Minute Meals

Of course, I made a couple of substitutions and changes. First of all, I halved the breading recipe. I couldn't find honey Corn Flakes, so I used Honey Bunches of Oats. I used chicken breasts instead of chicken tenders.

Overall, it was a good dish. I did think the grill seasoning was a little overpowering. I think next time I will cut it back. I could hardly taste the honey from the cereal.
I served it with sourdough toast (our grocery story bakery makes awesome breads!) and my go-to green veggie, peas.

This may be the last picture for a while. Our camera went on the fritz on Friday.


Wednesday, May 14, 2008

Recipe of the Week - BBQ Turkey Meatloaf

This week's recipe of the week comes from my new favorite Food Network show, Down Home with the Neelys. Pat and Gina Neely own a family BBQ restaurant business in Memphis, TN and they just debuted their show this year. They are so much fun to watch and their recipes always sound so good. This is the first one I've tried, though.

Instead of typing out the recipe, I'm just putting in a link to the Food Network site. It's probably easier to print out from there, anyway, if you want to make it.

BBQ Turkey Meatloaf
from Down Home with the Neelys

I did make a couple of substitutions. First, I didn't have enough paprika to mix up their BBQ seasoning. So, I used Lawry's Season Salt - it has basically the same ingredients. Second, I didn't make the BBQ sauce. I just used the sauce we love, Stubbs, made in Austin, TX. I've never been to the restaurant and I don't know if DH has. But, they make some darn good sauce. I definitely want to go to the restaurant when we go to Austin! (Not that I know when that will be!) I also cut the recipe in half (I just eyeballed the egg). It made plenty for DH and I to have generous servings for dinner and enough for lunch today. I served it with red-skin mashed potatoes (with the skin on).

The recipe was easy to put together and it was very tasty! DH wants it in the regular rotation so that's a good sign!

I did remember the pictures this time! It doesn't look very pretty on the plate, though.

Friday, May 9, 2008

Recipe of the Week - Goat Cheese Enchiladas

I made these on Monday in honor of Cinco de Mayo! I forgot to take a picture..

Overall, we liked them, though the goat cheese was a little rich. I think next time, I'll add some shredded chicken to the mix - maybe boil it with the liquid from the chile and some of the Mexican oregano for flavor. I halved the recipe, mainly because goat cheese is expensive! It made 5 enchiladas. I was afraid it wouldn't be enough food, so I also made a 
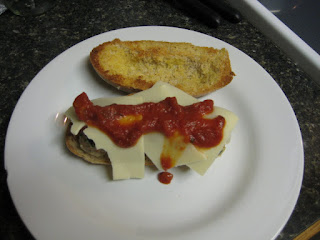
quesadilla with some shredded Mexican-blend cheese. Two enchiladas and 1/2 of a quesadilla was perfect for each of us.

I made the sauce on Sunday, just to save time when actually preparing dinner.

I'm linking to the original recipe, in case you want to read it or print it out without all my editorial comments.

San Antonio Style Goat Cheese Enchiladas
from Bobby Flay on the Food Network website

Ingredients
Red Chile-Tomato Sauce, recipe follows
12 blue corn tortillas (I used regular flour tortillas)
Goat Cheese filling, recipe follows
8 oz Monterrey Jack, grated
3 T chopped cilantro, for garnish (I left this out. I don't like cilantro)
Sour cream, for garnish
Chopped green onions, garnish (I left these off, too. We all know I don't garnish food when it's just DH and me!)

Directions
Preheat oven to 375 degrees.

Spread 1/2 c. of the Red Chile-Tomato Sauce into a medium, deep casserole.

Dip tortillas in remaining chile-tomato sauce to lightly coat both sides. (I found a pie plate worked well for this.) Spoon about 2 T of the Goat Cheese filling in each tortilla, roll up. (I put the tortillas on a cutting board to do this step. I also used way more than 2 T. of filling. But, I was using the big tortillas. Corn tortillas are usually smaller.)

Arrange the rolled tortillas in a casserole so they fit snugly. Pour 1 1/2 c. of the remaining chile-tomato sauce over the enchiladas, and top with grated cheese. Bake for 20-30 minutes or until the enchiladas are heated through. Remove and sprinkle with chopped cilantro, dollop with sour cream and garnish with chopped green onions.


Red Chile-Tomato Sauce
Ingredients
2 ancho chilies (After much searching in the produce area, we found these in the Mexican food section. They are dried.)
3 T vegetable oil
1 large red onion, finely chopped
3 cloves garlic, finely chopped
1 T ground cumin
1 T dried Mexican oregano
1 c. dry white wine
1 (16 ounce) can plum tomatoes, pureed (I don't know if the tomatoes I used were plum or not. It didn't say they were. I just got canned whole tomatoes.)
2 c. homemade chicken or vegetable stock (I actually had homemade turkey stock that I froze at Thanksgiving.)
Salt and freshly ground black pepper.

Directions
Bring 2 cups of water to a boil in a small saucepan. Add chilies, remove from heat and let sit for 30 minutes. (I used 2 cups even with 1 chile. I still didn't cover the whole thing, so I flipped it over after about 15 minutes.) Remove stems and seeds, place in food processor with 1/4 cup of the soaking liquid and puree until smooth.

Heat oil in a medium saucepan over medium-high heat. Add onions and cook until soft. Add garlic and cook for 1 minute. Add cumin & oregano and cook for 1 minute. Add ancho puree and cook for 2-3 minutes. Add wine, tomatoes and stock and cook for 20-25 minutes or until slightly thickened. Season with salt & pepper, to taste.


Goat Cheese Filling
Ingredients
1 1/4 pound goat cheese
3 cloves garlic, coarsely chopped
1/4 c. freshly graded pecorino Romano
2 T fresh lime juice
1/4 c. finely chopped cilantro (I left this out. Again, I don't like cilantro.)
Salt and freshly ground black pepper

Directions
Place goat cheese, garlic, pecorino Romano & lime juice in a food processor and process until smooth. Season with salt & pepper and fold in the cilantro.
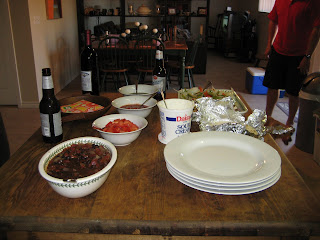
Wednesday, May 7, 2008

Last Week's Recipe of the Week - Chicken with Sweet Corn and Potato Saute

Wow, I've been bad about blogging! I made this last week and I never posted it. The flavors were good, but my potatoes were a little too al dente. I also made way too much of the corn & potato saute. I should have cut that in half! But, I'll be making it again since overall we liked it.

As a bonus, I got to use my new zester that I got in Dallas!

Chicken with a Sweet Corn and Potato Saute
from Express Lane Meals by Rachael Ray

Ingredients
4 boneless, skinless chicken breasts
Salt and black pepper
Zest and juice of 1 lemon
2 large baking potatoes, scrubbed clean or peeled
4 T. extra virgin olive oil
1 t. dried thyme 1 medium onion, finely chopped
2 large garlic cloves, chopped
1 10-oz. box frozen corn kernels
1 1/4 c. chicken stock
2 T. butter
1/4 c. fresh flat-leaf parsley, chopped

Directions
Season the chicken breasts with salt, pepper and lemon juice. Let the chicken marinate while you get the rest of the meal going.

Cut the potatoes into quarters lengthwise. Arrange the quarters cut side down on a cutting board. Thinly slice the potatoes across the width - you want thin, bite-size pieces.

Heat a nonstick large skillet over medium-high heat with about 2 T. of the olive oil. Add the potatoes in an even layer across the hot skillet. Season with salt, pepper and thyme. Resist the temptation to stir the potatoes for about 2 minutes to let them brown up a little bit. Once the potatoes brown, stir in the onions and garlic and continue to cook, stirring occasionally, for 7-8 minutes or until the potatoes are flirting with tenderness. If the potatoes are getting too dark, turn back the heat a little.

While the onions and potatoes are cooking, preheat a second large skillet with the remaining 2 T. olive oil. Add the chicken breasts and cook for 5-6 minutes on each side.

While the chicken is cooking, add the corn kernels to the potatoes and cook, stirring frequently, for 2-3 minutes. Add the chicken stock, turn the heat up to high and bring the stock up to a bubble. Continue to cook for 3 minutes, or until the liquids have reduced by half. Turn the heat off and add the butter, parsley and lemon zest, stirring until the butter is completely melted.


Serve the chicken whole or sliced on top of the sweet corn and potato saute.


The only change I made was to use red potatoes instead of baking potatoes. I did 4 poatoes for the two of us and I should have only done 2. I couldn't find a 10 oz. bag of corn, but I did find a 12 oz. Again, way too much. Next time, I'll just get the 16 oz. bag and use 1/2 of it.

Wednesday, April 23, 2008

Recipe of the Week - Biohazard Chicken

I came across this recipe in another blog, Bean's Bistro. She calls it Biohazard Chicken because when it's marinading in the plastic bag, it kinda looks like a biohazard. I have to say I agree.

It's a quick and easy marinade, though and it sure made tasty chicken! I had it in the marinade for about 3 hours, and cooked it on our indoor grill. I really want to try it again when DH feels like grilling outside. I halved the recipe and only marinated 2 chicken breasts. I served it with white rice. We were supposed to have, peas, too. But, I put them in the pot and then turned on the wrong burner and didn't realize it until the chicken was ready. At that point, we didn't feel like waiting for the peas to cook!

Biohazard Chicken
From Bean's Bistro by Erika

Ingredients
1 c. ketchup
1/2 c. soy sauce
1/4 c. honey
1-2 garlic cloves, crushed & chopped (I just put mine through the garlic press)
2-12 boneless chicken breasts

Directions
Combine all ingredients except chicken in a large plastic Ziploc bag. Close bag tightly. Mush everything together until well mixed.

Add chicken into bag and reseal. (I pierced the chicken w/ a fork on both sides first.) Massage marinade into meat.

Chill chicken until it is ready to be grilled. Chicken will keep at least 24 hours, though it will still be yummy after only 15 minutes.

Cook chicken over medium grill heat until cooked through, but still moist.

Wednesday, April 16, 2008

Recipe(s) of the Week: Salmon Burgers with Apple Craisin Salad

Yes, it's true, this week we have not one, but two, recipes of the week. I can't actually take credit for making both of them, though, because my DH actually made the salad. But, it was still a new recipe and the two were so perfect together I had to post them both.

I got Rachael Ray's cookbook Express Lane Meals a while back, but I hadn't made anything from it, so last weekend I went through and marked a bunch of the recipes I thought sounded good. One of them was this week's first new recipe - the Salmon Burgers. (Full disclosure is important here - I don't want to end up like Cindy McCain and get berated in the press for copying recipes from Food Network chefs! Then again, my husband isn't running for president, so the press isn't really out to find stuff to berate me for. But, I digress.)

The second recipe, Apple Crasin Salad, comes from Sam's Club. We love to go to Sam's on Saturdays when the "sample ladies" are there. At our location, not only do they have just straight up samples of prepared items, but they also usually have station with recipes. The funny thing about this one is when we asked where the Crasins were, they said they were out and they'd had to run across the parking lot to Wal-Mart to get them for the demo! We found that quite funny. Someone didn't plan too well. Oops, I'm digressing again.

Anyway, here are the recipes:

Salmon Burgers
from Express Lane Meals by Rachael Ray

Ingredients
1 14 oz. can Alaskan Salmon, drained & flaked
2 egg whites, lightly beaten
A handful of fresh flat-leaf parsley, finely chopped
Zest of 1 lemon
2 garlic cloves, finely chopped
3/4 c. Italian bread crumbs
Black Pepper
Salt
2 T. extra virgin olive oil

Directions
Combine all ingredients except olive oil in a bowl. Form 4 large patties or 8 small patties Preheat the olive oil in a nonstick skillet over medium to medium-high heat. Cook the salmon patties for 2-3 minutes on each side for mini patties, 4 minutes on each side for large patties.

I didn't use the parsley and I substituted a couple squirts of lemon juice for the lemon zest.

The recipe calls for them to be served on a bed of slaw, but we wanted to do a more traditional burger treatment, so we bought some yummy multi-grain rolls from our awesome grocery store bakery. I mixed some mayonnaise and Dijon mustard to make a spread for the bread.


Apple Craisin Salad w/ Apple Vinaigrette Dressing
recipe from Sam's Club

Ingredients
For Salad:
1 pkg. spring mix
1 c. Ocean Spray Craisins
2 c. Red Delicious apples, chopped

For Apple Vinaigrette:
1/2 c. apple juice
2 T honey
2 T lemon juice
1/4 c. extra virgin olive oil
1/4 t. salt
2 T white vinegar

Directions
In a large bowl, combine the spring mix, chopped apples and Craisins.

In a small bowl, combine the apple juice, honey, lemon juice, olive oil, salt & vinegar. Mix well with a whisk.

Pour vinaigrette over salad and toss.

Sunday, April 6, 2008

Recipe of the Week - Grilled Raspberry Chicken

This week's recipe of the week comes from the Food Network. I usually have the TV on in my office while I'm working. Otherwise, the silence drives me crazy. It's one of the drawbacks of working from home.

Anyway, in the afternoons, I usually turn to Food Network. Semi-Homemade Cooking with Sandra Lee is one of the shows I usually catch. Now, I honestly think Sandra Lee is kind of annoying. I also think it's silly how "themey" her show is - if you've never seen it, there's a different theme every episode, and her kitchen is decorated around the theme. All her appliances and accessories are changed to match the theme. I swear, the woman has a Kitchen Aid mixer in every color there is.


At the end of the episode, she shows a "tablescape" - again, it matches the theme - with appropriate dishes, linens, place cards, etc. I'd love to know what the show's budget is, because I've never seen the same dish twice. If only I had that kind of money to spend on entertaining - not to mention the storage space.

I find it ironic, because her whole deal is making inexpensive dishes with a mix of fresh and store-bought ingredients. I guess she spends the money she saves on decor! Oh, and there's a cocktail in every episode. Can we say lush? But, I gotta be honest - sometimes her recipes sound good. And this is one that caught my ear, so I tried it this week.


Grilled Raspberry Chicken
from Semi-Homemade Cooking with Sandra Lee

Ingredients

6 boneless, skinless chicken breasts
1/2 c. frozen raspberries, thawed (recommended: Dole)
1 c. raspberry vinaigrette (recommended: Annie's)
1/4 c. raspberry vodka, optional
1/4 c. finely chopped fresh mint leaves
Fresh mint sprigs, for garnish
Fresh raspberries, for garnish

Directions

Rinse and pat dry chicken breasts with paper towels. Place in large zip-top bag. Add raspberries, vinaigrette, vodka, if using and chopped mint. Squeeze air out and seal bag. Gently massage the bag to mash raspberries.

Marinate in the refrigerator for 1 to 4 hours.

Preheat grill to medium-high and oil the grates. Place the chicken breasts on the grill and cook for 4 to 6 minutes per side. Remove from grill and place on serving platter. Garnish with fresh mint sprigs and fresh raspberries.


As you can see, I did not garnish with fresh mint and raspberries. Maybe if we were doing it for company, I would, but for just DH and me, it seemed like a waste. Plus, fresh raspberries aren't in season, so they were expensive!

I also did not use the raspberry vodka. We did so many errands last week and I just didn't feel like adding the liquor store to the list. Maybe next time. I didn't use Dole fruit (our store only had store brand frozen raspberries), but I did use the Annie's dressing. I love that brand!

The other change I will make is to pierce the chicken before I put it in the marinade. The marinade just didn't penetrate enough.

Oh, that side dish is mashed red potatoes (with skin) made with milk, and sour cream. Yum!

Thursday, February 21, 2008

Recipe of the Week - Fish Tacos

Once a week, DH does a cooking segment for his noon newscast. He works with the chef at a local hotel, who comes up with the dish and does the actual cooking. Last week, the dish was Fish Tacos and he enjoyed them so much he wanted me to make them at home. Since Mexican food is one of my favorites, I was happy to oblige!

I didn't really have a recipe, just my memory of how they did it on the show.

These are my not-very-exact directions:

Ingredients
Frozen Fish Patties - you need 1 per taco (We used Gorton's beer battered version)
Soft Corn Tortillas - the small taco-sized ones, not the big burrito-sized ones - you need 1 per taco.
Butter
Ranch Dressing
Sour Cream
Salsa
Shredded Cheese (we used Sargento 4-cheese Mexican shredded blend)
Shredded Cabbage

Directions
Prepare fish according to package directions. If you have a deep fryer, you can use that. We don't, so I baked them in the oven and it tasted fine. While the fish is baking, butter each side of the tortillas and fry them in a frying pan to brown them a bit. You still want them to be soft. Mix ranch dressing and sour cream to taste and set aside. When the fish is done, assemble the tacos - put one piece of fish on each tortilla, and top with the sour cream mixture, salsa, cheese and cabbage.

Here's a picture of the taco being assembled. I had forgotten the cheese. We didn't use the cabbage b/c on the show, DH said he didn't really like cabbage so I didn't buy any. He told me as we were making them that he thought the cabbage was actually good on the tacos. He could have mentioned that while we were at the grocery store! Well, there's always next time!

Here are my finished tacos with a side of chips and salsa mixed with the leftover sour cream/ranch mixture.

Monday, February 11, 2008

Savory Peach Chicken

A couple of weeks ago, I had to do some work on a Saturday and while I did I had the Food Network on in the background. One of the shows I listened to was a new one "Healthy Appetite with Elie Kreiger." (I may have spelled that wrong.) Anyway, she made chicken with peach sauce. I thought it sounded yummy, so I printed the recipe to show DH. He agreed it sounded good, so I added it to the menu for the week.

It even had an ingredient I wasn't familiar with - Rice Vinegar. Fortuneately, we easily found it at the grocery store .

It called for frozen peaches, but I couldn't find those so I used canned.

Here's a picture of the finished product. I served it over pasta because that was all we had. I wanted to do couscous, but I didn't realize we were out. It had kind of an Asian flair, so rice noodles might be good, too. I'll definitely be making it again, so I'll have to experiment!

The recipe can be found here: